Live Sessions
Live Session Trainers
Overview
A trainer is basically someone that delivers a type of content. You can use this resource with In Class or Virtual Class sessions.
Prerequisites Before you can use a trainer in a live session that resource needs to first be created. This can be done, manually, from the Resources page, in the trainers section. For step by step instructions on how to do this please follow the Create Trainer Guide.
Managing Trainers
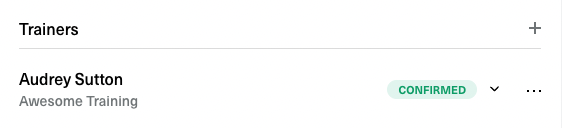
You can perform different trainer specific actions from the trainer card, in the Live Session View Page. In that section you can add or remove trainers, update their status, notify them about the upcoming session or request them to fill out the attendance form.
Sessions With Multiple Trainers
A session can also have multiple trainers in order to account for different types of content delivery. With that in mind not all trainers are created equal in Nifty. The first trainer that you add on a live session can be thought of as the Lead Trainer. The ones that will be added afterwards are Non-Lead Trainers.
- Lead trainers can go through a booking - confirmation process and their status will change based on their response.
- Non-lead trainers are pre-confirmed, no invitation emails will be sent to them.
Trainer's Statuses
Like many other resources trainers make use of statuses to signal their state in the session administration flow.
| Status | Description | Available actions |
|---|---|---|
| Draft | Trainer was added to Live Session | Change/Remove/Book |
| Waiting | Course Delivery Request email was sent to the trainer | Change/Remove |
| Confirmed | Trainer confirmed the Course delivery request via email | Change/Remove/Send Attendance Form (only for lead trainer) |
| Declined | Trainer declined the Course delivery request via email | Change/Remove |
Statuses Flow
The statuses can be updated manually but they also change based on different responses.
| No. | From | To | Trigger |
|---|---|---|---|
| 1 | - | Draft | First trainer is set to 'Draft' automatically |
| 2 | Draft | Waiting | Automatic change - when invite is sent to trainer; Manual change - user has to select the option from the arrow menu next to 'Draft' status |
| 3 | Waiting | Confirmed | Automatic change - when trainer confirms from email invitation; Manual change - user has to select the option from the arrow menu next to 'Waiting' status |
| 4 | Waiting | Declined | Automatic change - when trainer declines from email invitation; Manual change - user has to select the option from the arrow menu next to 'Waiting' |
| 5 | Confirmed | Declined | Automatic change - when trainer declines from email invitation after he previously confirmed; Manual change - user has to select the option from the arrow menu next to Confirmed' status |
| 6 | Declined | Confirmed | Automatic change - when trainer confirms from email invitation after he previously declined; Manual change - user has to select the option from the arrow menu next to 'Declined' status |
| 7 | Confirmed | Draft | Automatic change - when first trainer who previously confirmed is changed ; Manual change - user has to select the option from the arrow menu next to 'Confirmed' status |
| 8 | Declined | Draft | Automatic change - when first trainer who previously declined is changed ; Manual change - user has to select the option from the arrow menu next to 'Declined' status |
Create a Trainer
- Go to the Resources Page.
- Click on the Create button in the top right corner of the page and then select the Create Trainer option.
- The Create Trainer side modal should appear where you can fill out all the inputs and then create the resource.
Fields Reference
| Field | Description | Is Required |
|---|---|---|
| First Name | The person's first name | Yes |
| Last Name | The person's last name | Yes |
| An email address that will be used for notifications | Yes | |
| Vendor | The company that employs the trainer. Used for reporting and analytics | Yes |
| Can Deliver Any Course | If you don't want to filter data | If the courses list is empty |
| Courses | A list of specific courses that can be delivered | If can deliver any course is false |
| Phone Number | Used just for informational purpose | No |
| Location | Used just for informational purpose. Settings this field will not restrict the location where the trainer can deliver sessions | No |
Edit a Trainer
- Go to the Resources Page
- Search for the trainer that you want to edit
- In the Trainers List table go to the row that you wand to modify and click on the edit Action Icon.
- The Edit Trainer side modal should appear where you can edit specific fields.
Add a Trainer to a Live Session
- Go to the Live Session View page
- From the Trainers Card click on the Add button icon, in the top right part of the card.
- A modal with a select input will appear. From there you can search for a specific trainer and add them to the session.
Trainer Select Filtering Rules
Trainers that are booked for other sessions that overlap with the current session will not be shown. Trainers that can not deliver that specific course will not be shown.
Change a Trainer on a Live Session
- From the Live Session View Page, on the Trainers Card, click on the More Options icon.
- Select the Change option
- The same Trainer Select Modal, like the one used for adding a trainer, will appear.
- After submit, the trainer will be added on the session in place of the previous one with the status Draft.
Book a Trainer on a Live Session
- From the Live Session View Page, on the Trainers Card, click on the More Options icon.
- Select the Book option.
- An email with details about the training session and confirm/decline actions will be sent to the Lead Trainer
- Based on the trainer response the status will change to either Confirmed or Declined
Restrictions
You can only book trainers that have the status Draft. Non-Lead trainers are pre-confirmed so no invitation emails will be sent to them.
Remove Trainer from a Live Session
- From the Live Session View Page, on the Trainers Card, click on the More Options icon.
- Select the Remove option
- A confirmation dialog will appear. After the confirming the trainer will be removed