Learning Programs
Learning Programs
Overview
Learning programs are a way of creating complex learning experiences for your employees. Inside a learning program you can connect different types of content based on completion status and other types of rules.
Create a Learning Program
- Go to Activity and click on the Create button
- Select the Create Learning Programs option
- A new form will appear where you will have to fill in the initial information of the program.
- Click on Submit. Your program will be created and from there you will be directed to the Learning Program View Page. Right now the program does not have an actual structure. We will define that in the following steps.
Define the structure
- Click on the Add Content button
- Select all the learning content that should be used in the program.
- Once you have added all the content, submit the form, and you will be redirected to the Program Structure Modal.
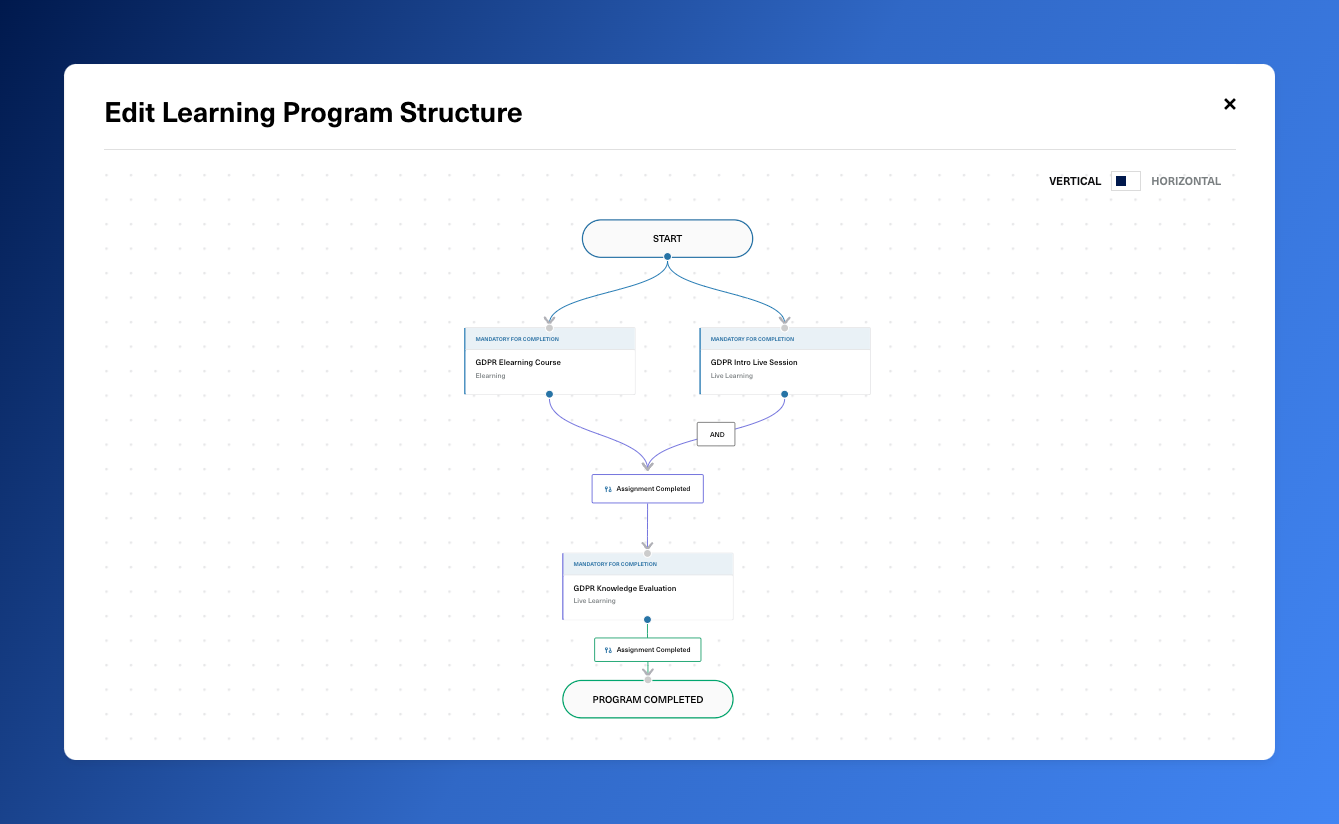
- In here you are presented with a graph UI that uses different types of nodes to allow you to define the structure of the program. You will notice that the learning content nodes have two dots:
- A grey one - You can drag edges from other nodes into this dot in order to define when it should be available to the learners.
- A blue one - You can drag edges from this dot to other content nodes in order to create conditions based on it.
- Drag an edge from the Start node to the first piece of content that should be available to the learners.
- From there continue connecting nodes until you reach the last content item. In order to mark it as the final point you will have to connect that item to the Program Completed Node node.
- Submit the form. Now you have defined the structure of a basic learning program!
Editing the structure
You can always add changes and redesign your structure by clicking on the Edit button in the top right corner of the Program Structure card.
Keep in mind that, once you have launched the program, new changes to the structure will not be reflected in the active program instances. You will have to manually add new instances that will be based on the new structure.
Types of nodes
The program structure UI exposes different types of nodes that provide visual aids towards defining the structure of a program:
Start Node
This element is used to signal the initial content that will be assigned to a learner at the beginning of the program. Any content node that has a connection to a Start Node will be assigned to a learner from the begining of the program.
Learning Content Node
The actual learning content that can be accessed by the learner. Drag edges from and to these nodes in order to set the order in which the content will be presented to the learner.
Condition Node Once you connect two pieces of content you will see another node that describes what is the condition by which a learner will receive a new assignment. If you click on this node you can change what will trigger the process of assigning the next learning item.
Rule Combinator Node
If you connect a learning item to more than one other piece of content, you will see multiple conditions and another type of node that specifies how those conditions are combined between them (or/and). Click on it and it will toggle between And/Or.
Program Completed Node
In order to mark a program as completed, you will need to connect one or more pieces of content to the Program Completed Node. This way you are describing what are the conditions for the learning program to be considered completed.
Program Failed Node
The same behavior as the Program Completed Node applies here, but in this case you are describing what are the conditions for the learning program to be considered failed.
Edit Rules
By default, when you connect two learning items, they will be tied together based on the completion of the first item. You can change that criteria by clicking on the Condition node. When you do that a new form will appear.
Use this form to change what will trigger the process of assigning the next learning item. You can choose between:
- Learning item is started
- Learning item is completed
- Learning item is failed
Besides that you can also change the name of the condition in order to make it more descriptive and you can also postpone the moment when the learning item will be assigned by specifying a schedule date.
Remove Rules
To remove a rule you just have to right click on the node and select the Remove Rule option.
Blocked Paths
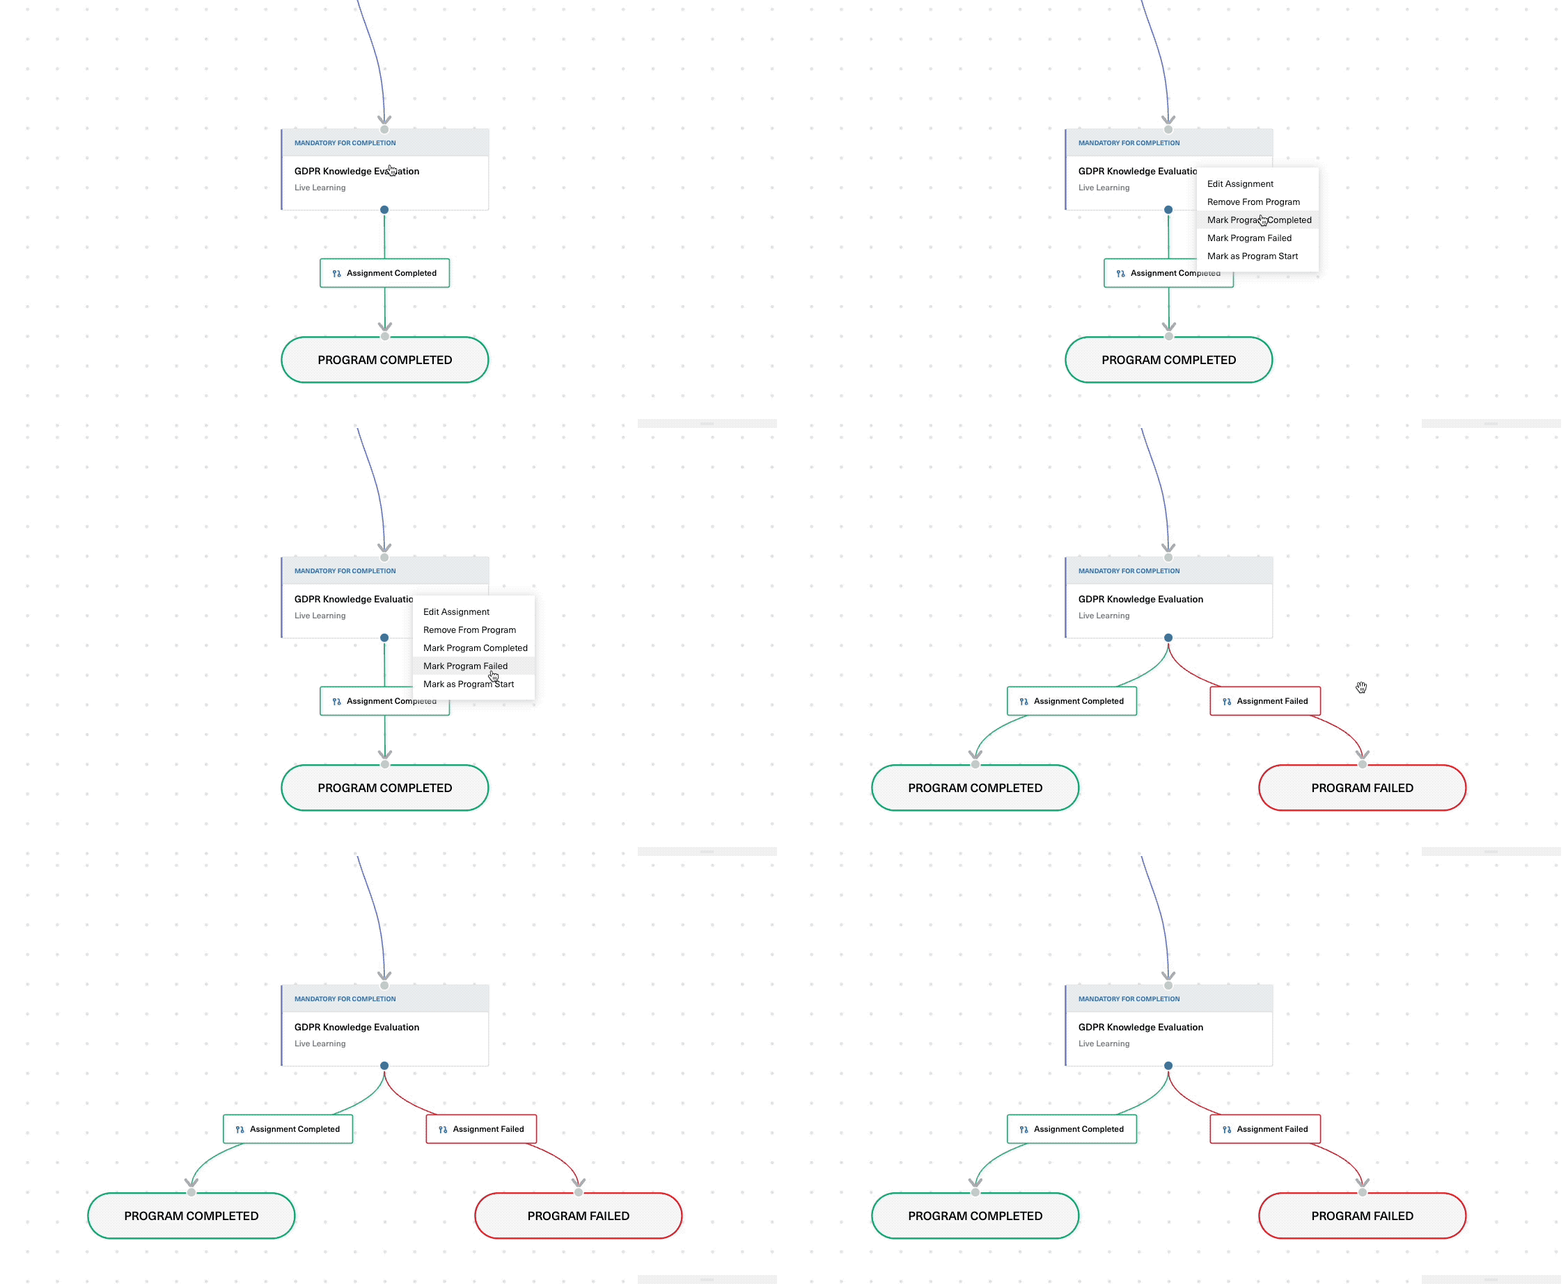
If your program has content items that can end with a failed status (like an assessment or an elearning course) you will have to define what should happen in those cases from the program structure form.
Otherwise, if the progress of a learner inside a learning program ends up in a state in which they cannot reach the Program Completed or Program Failed nodes, Nifty will mark that instance with the status Blocked
Optional Content
If a piece of content does not have a direct connection to the Program Completed node Nifty will consider it optional by default. You can click on the Program Completed node and the mandatory items that are needed for that completion condition will be highlighted while the rest will be greyed out.
Common Structure Editing Actions
In the following sections we will cover some common actions and the way that they can be accomplished when editing a learning program.
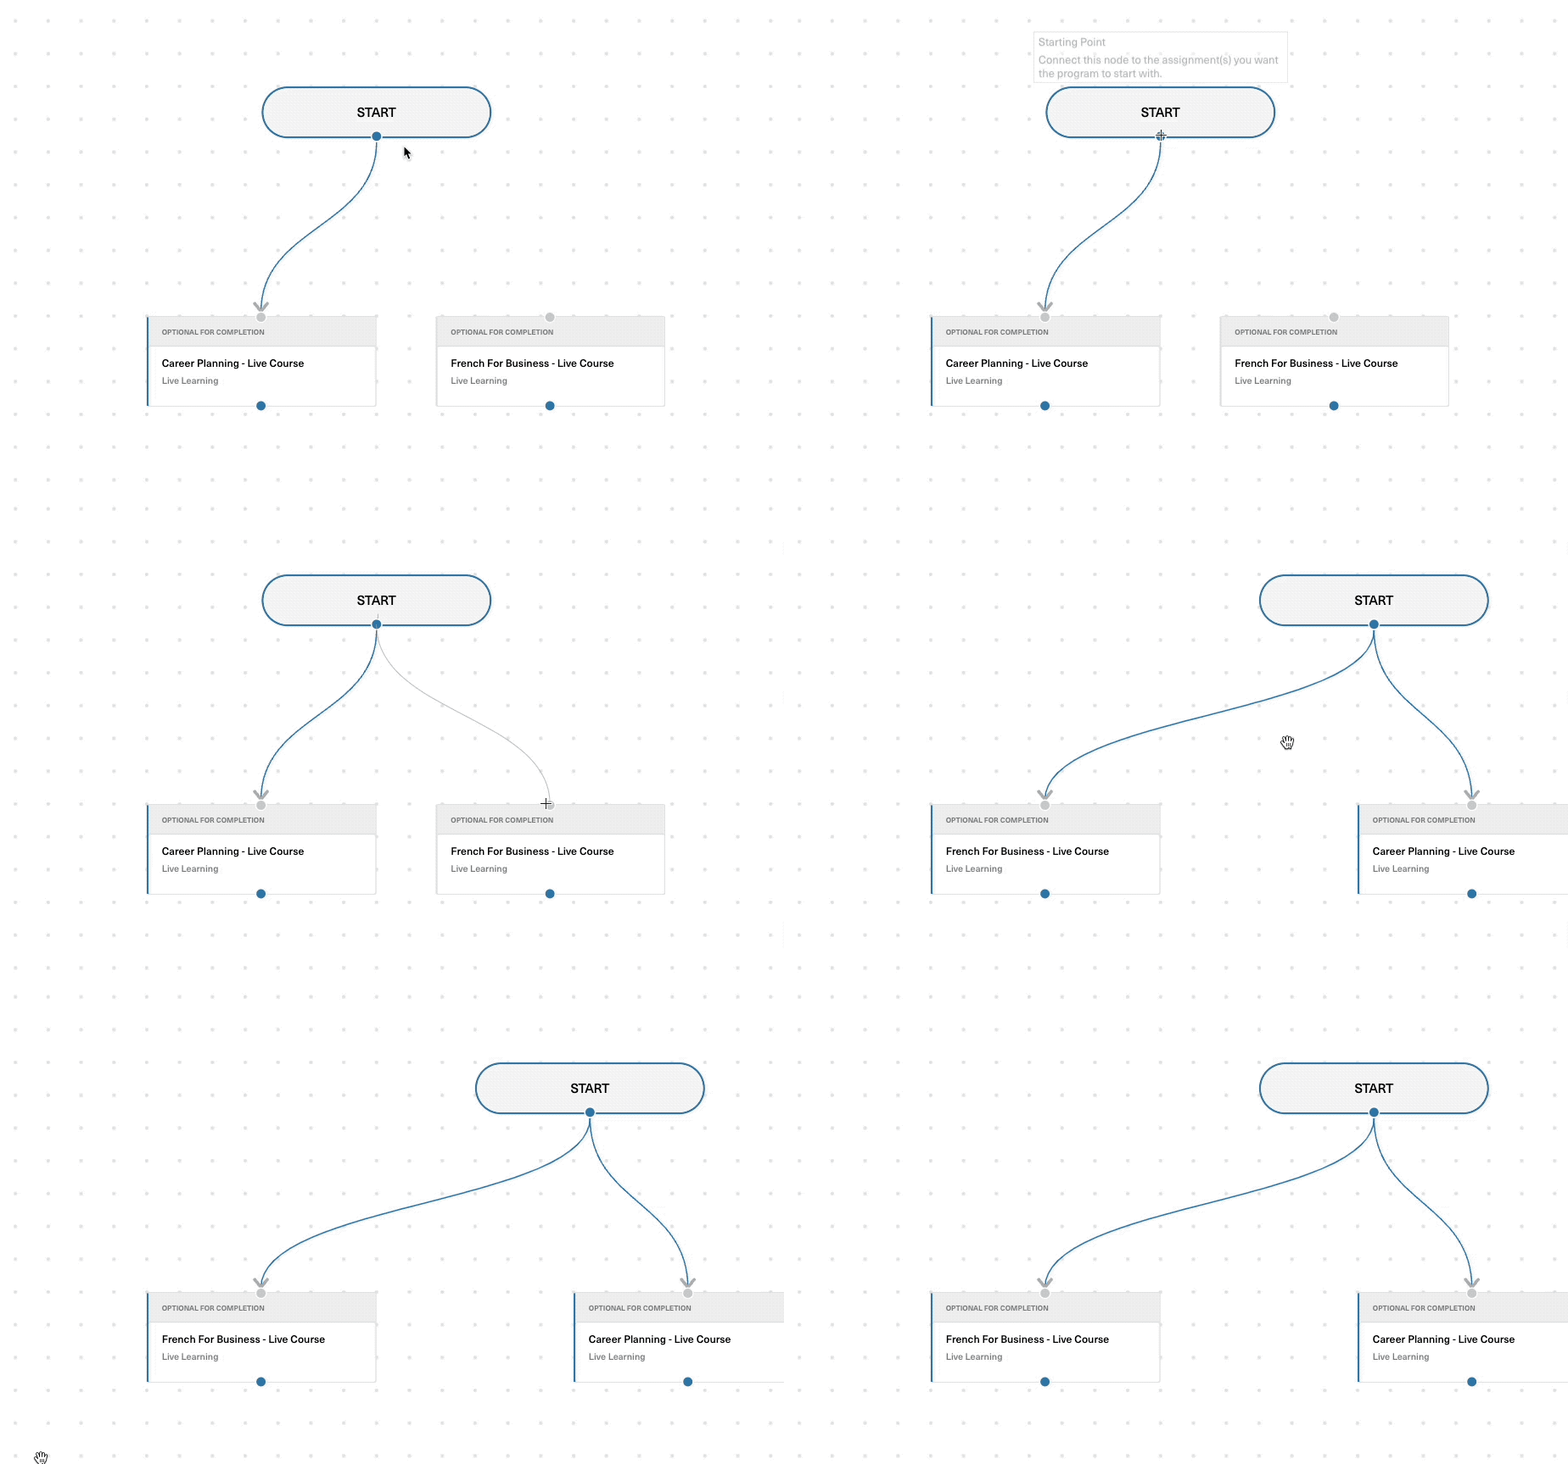
Start with more than one learning item
If you want your learning program to have multiple pieces of content at the beginning you can just connect all those nodes to the Start Node.
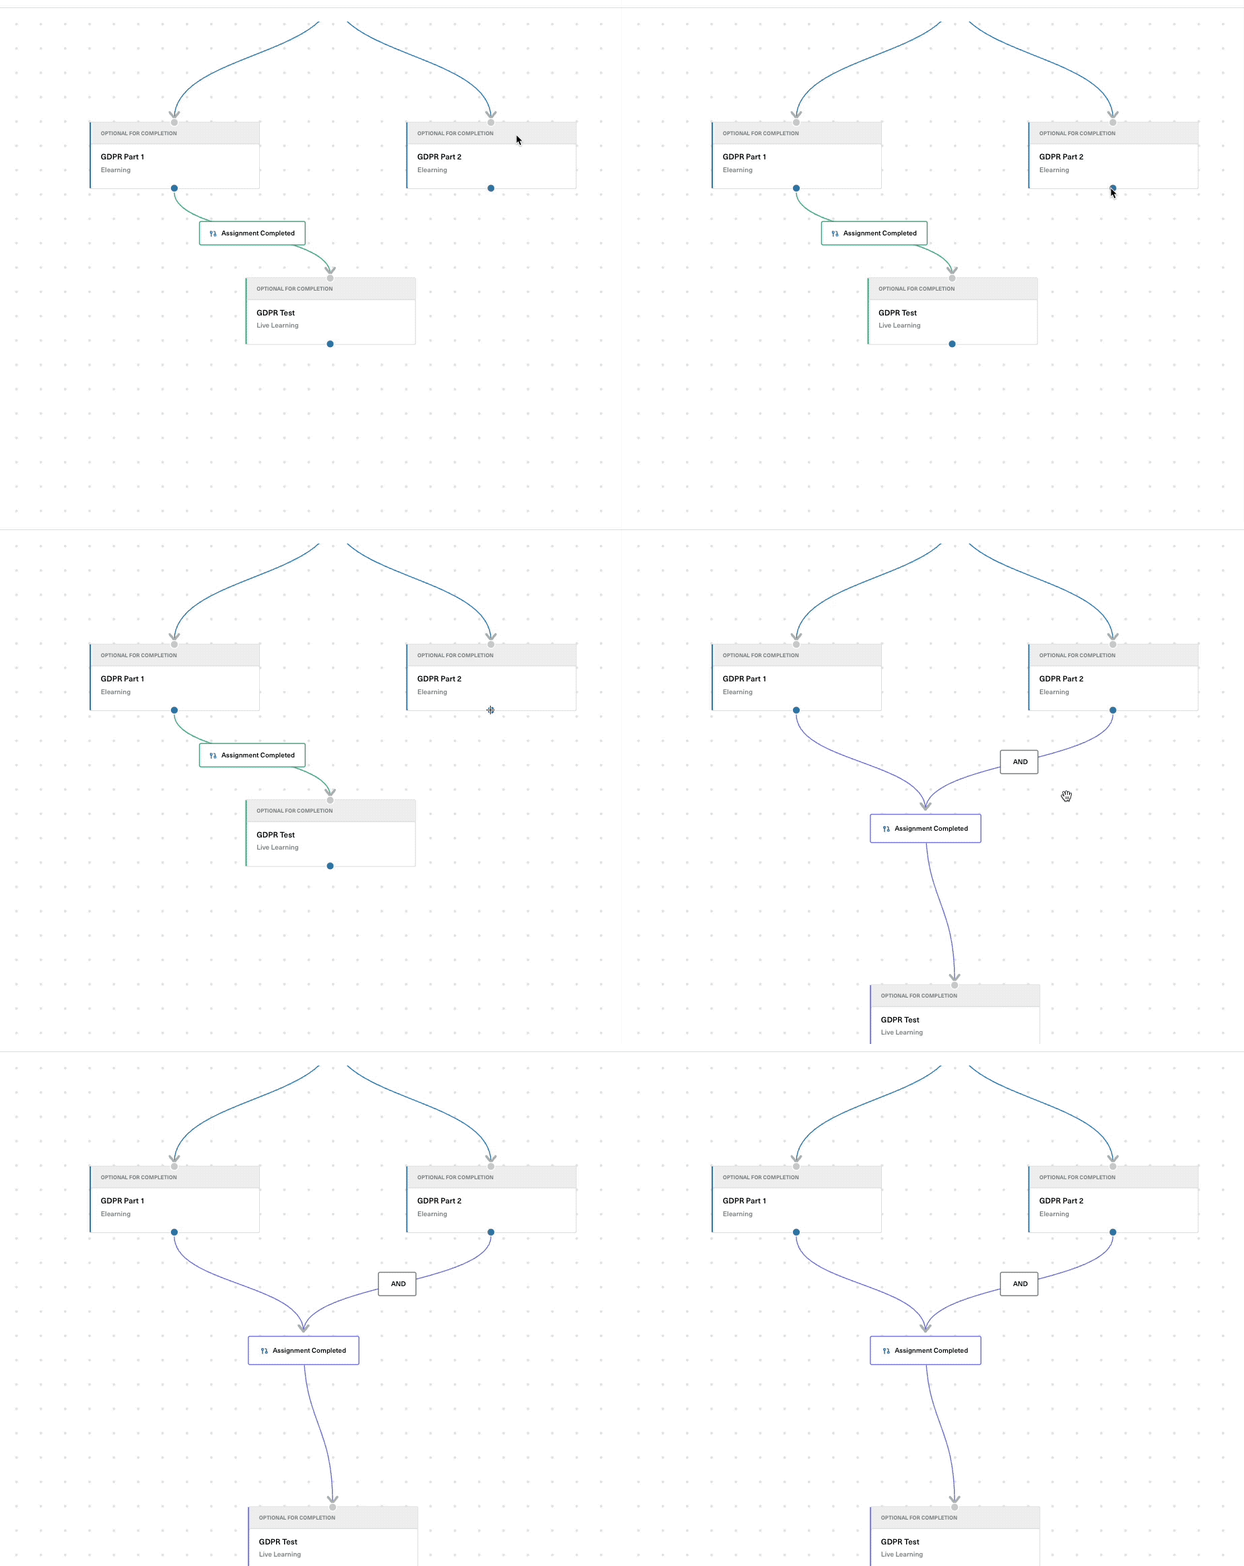
Condition an item on the completion of two previous nodes
For more complex scenarios, where a learner needs to finish multiple things before moving on to the next phase you can just connect those mandatory pieces of content to the node that needs to be assigned next. Nifty will automatically connect everything together
Multiple completion paths
If your program should have more than one way of completing it you will just have to right click on one of the final content items and click the Mark Program Completed option. For more complex conditions (eg: multiple learning items need to be finalized for that completion rule) you will have to connect all the content nodes to the new program completion node.
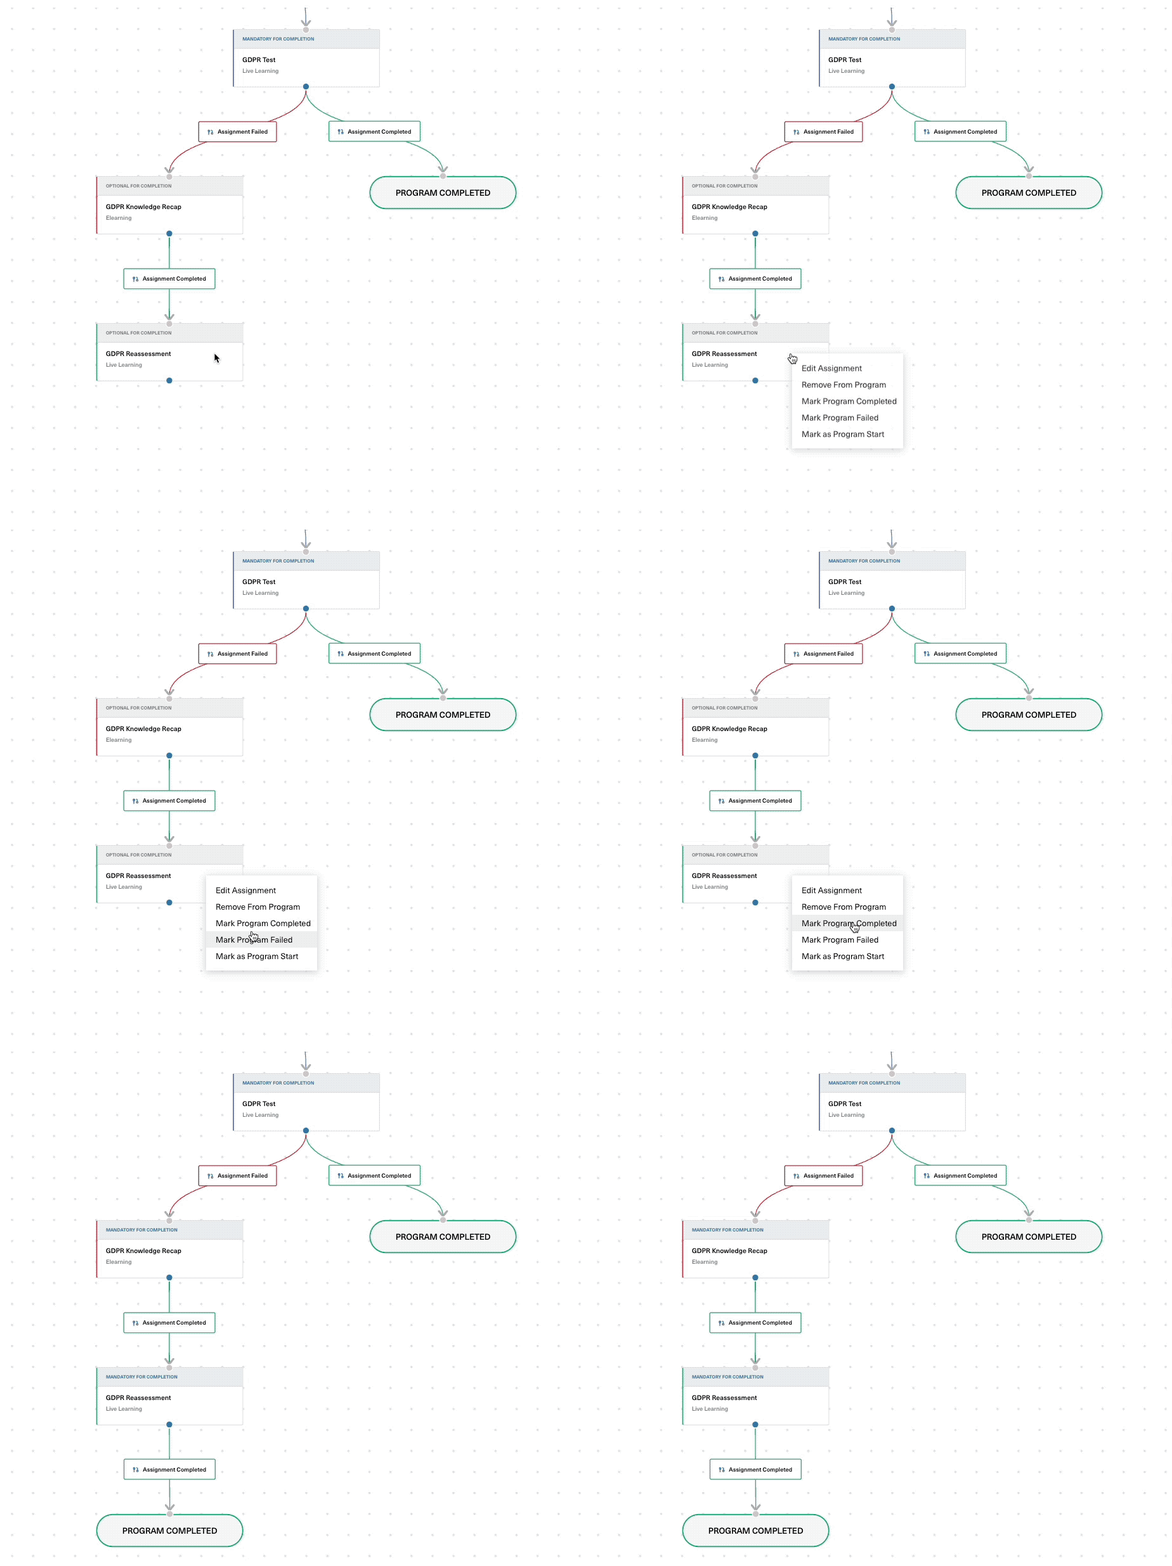
Mark program as failed
In order to define when a learner's progress through the program should be marked as failed you will just have to right click on the content node that will trigger this action an select the Mark Program Failed option.